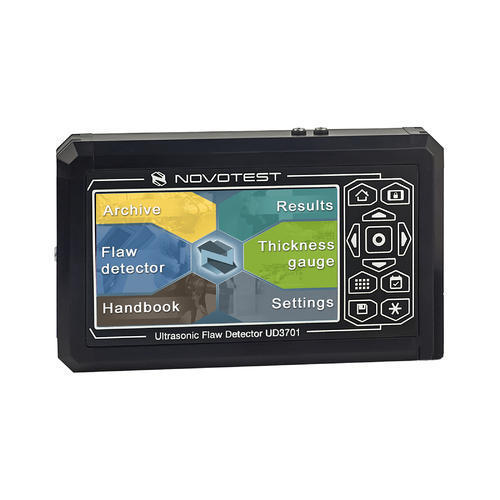
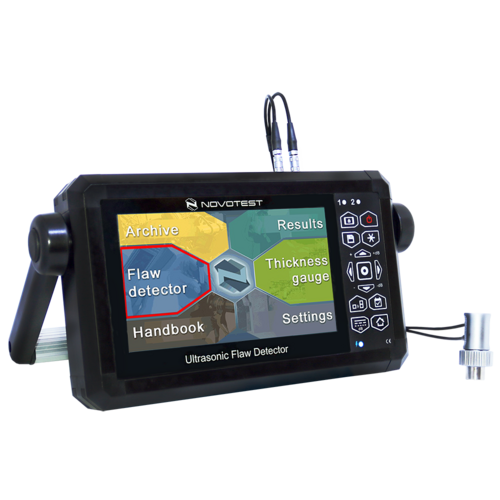
Novotest UD3701 Ultrasonic Flaw Detector
Product Details:
- Color Black
- Weight 1.7 Kilograms (kg)
- Product Type Ultrasonic Flaw Detector
- Usage Industrial
- Voltage 15 Volt (v)
- Frequency 10-100 Hertz (HZ)
- Click to View more
Novotest UD3701 Ultrasonic Flaw Detector Price And Quantity
- 115000 INR/Unit
- 1 Unit
Novotest UD3701 Ultrasonic Flaw Detector Product Specifications
- 10-100 Hertz (HZ)
- Ultrasonic Flaw Detector
- 1.7 Kilograms (kg)
- Industrial
- 15 Volt (v)
- Black
Novotest UD3701 Ultrasonic Flaw Detector Trade Information
- 1000 Unit Per Day
- 1 Week
Product Description
| Brand | PRO Engineers Novotest |
| Display Type | UD3701 has large 7 inch touch screen display and powerful, lightweight, portable and ergonomic impac |
| Power Source | power supply 220V, 50Hz AC |
| Material | MAX length of tested material up to 6000 mm (echo mode) |
| Weight (kg) | 1.7 kg with standard battery (4000 a / h) |
| Frequency (Hz) | automatically controlled from 10 to 100Hz |
| Dimension (mm) | Dimensions (H x W x L) 140 mm x 210 mm x 55 mm with standard battery (4000 a / h) 140 mm x 210 mm x |
| Voltage (V) | 15V 2A |
| Minimum Order Quantity | 1 Piece |
Product Description
- Frequency range with continuously adjustable from 0.2 to 10MHz
- Two independently controlled gate (A and B)
- Automatic or manual construction of the TCG curve (32 points)
- Two types of representations of signals: detection and radio
- Build and handling A, B scans
- Modes: envelope, freeze and display of the beam
Detailed specifications of Ultrasonic Flaw Detector NOVOTEST UD3701
Scan- min .: 0 6 s
- max .: 0 1000 s
- step 25 ns
Exposition
- from 0 s to 1000 s
- step 25 ns
MAX length of tested material
- up to 6000 mm (echo mode)
Velocity range
- 1000 9999 m/s
Exposition in the prism
- 0 100 s
- step 25 ns
Damping
- 50 Ohm
Input impedance
- 50 Ohm / 600 Ohm
Probes pulse
- RF pulse with amplitude of 100, 200 or 300V,
- With variable length from 25 to 500 ns,
- step 25 ns
Repetition frequency of SP
- automatically controlled from 10 to 100Hz
Amplifier
- Wideband 0.4-20 MHz (-6 dB)
Gain control range
- 115 dB, step 1 dB
Time control gain (TCG)
- range up to 70 dB, 12 dB / s with the construction of the curve through 16 reference points, entered by hand or by the control reflectors
Amplitude-Distance curve
- drawing through 16 points, height adjustable
Detection
- positive or negative half-wave, complete, the radio signal (at all range of scan), B-scan
Cutoff
- compensated, 0 90% of screen height
Zone control
- two independents areas, the beginning and width are change at all scan range; levels of limits are set from 0 to 100% of display height; individual logic of detection defects.
Automatic Alarm of defects
- light logic of detection defect in zone for each zone individually and sound individual logic detection defect at the zone
Time intervals measurement
- from 0 to a first signal in the zone or between
- signals in the zones to the front or to the maximum signal
Measurement of amplitude
- in dB relative to threshold level in the zone;
- in dB relative to the reference signal;
- in dB relative to the amplitude-distance curve.
Display
- Colored, TFT 320 x 240 pixels 135 x 100 mm.
Memory
- Limited of SD cards capacity
Interface
- USB, Bluetooth (optional)
Connectors of probes
- 2 Lemo
Battery
- Li-on 4-7 a / h
Battery life
- up to 10 hours with the battery 4000 a / h
- up to 24 hours with the battery 6600 a / h (optional)
External power supply
- power supply 220V, 50Hz AC
Supply voltage
- 15V 2A
Operating temperature range
- from -30 C to + 55 C
Dimensions (H x W x L)
- 140 mm x 210 mm x 55 mm with standard battery (4000 a / h)
- 140 mm x 210 mm x 85 mm with the battery 6600 a / h (optional)
Weight
- 1.7 kg with standard battery (4000 a / h)
- 2.7 kg with battery 6600 a / h (option)
 English
 Spanish
 French
 German
 Italian
 Chinese (Simplified)
 Japanese
 Korean
 Arabic
 Portuguese


 Call Me Free